

Post by Artemis on Jun 13, 2010 14:41:56 GMT -5
Coloring Linearts
Basic Coloring
----------------------------------------------
Basic Coloring
----------------------------------------------
Intro.
Most lineart that you find on the internet that is of high quality can't just be filled in with the fill bucket without being messed up. This is because of the curves in the lines that use different degree of transparency in order to make a smooth curve. This tutorial is to help you go through this by showing you one of the methods of coloring linearts like this.
Step by Step with Images
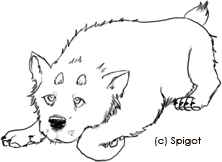
First, download your image and save it so that you can open it with the transparency intact. You would need to use a graphics program like Photoshop or GIMP in order to play with transparencies.
Make a new layer so that you have two layers. The top layer will just be the line art.

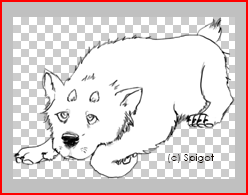
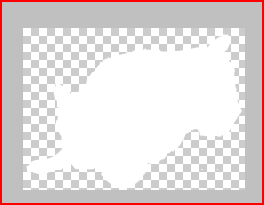
The bottom layer is transparent, but then you fill it in white. If you hide the top layer, it should look like the picture above.
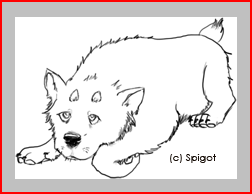
The picture, with both layers on top of each other should look like the above.

Next step is to select all the areas outside of the pup using the tool indicated above. It is the magic wand tool. It selects all the space in the area you choose. If you have more than one area to select, hold down Shift and select the areas while you do so.
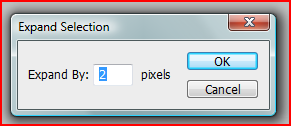
This step is very important and is how you avoid the dreaded white specks when you use the fill tool. You have to modify the selection by expanding it by two pixels. Two pixels usually takes care of the job. On Photoshop, you find this by going to the menu bar: Select>Modify>Expand. GIMP should have something similar.
The next step is to go to the white fill layer while everything is all selected. And then, you press delete. This gets rid of all the area outside of your lineart and makes a white shape under your lineart that matches it. This is where your coloring takes place.
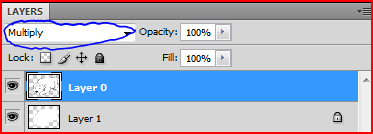
Next, go back to your lineart layer and set it to multiply mode. This makes all the areas that are white see-through and keeps the black lines. Very helpful.
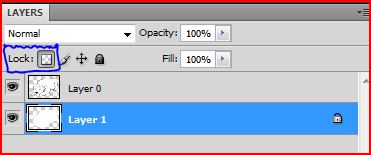
Here, you go to your white-fill layer and lock the transparency. This means that you can't color outside the lines because everything stays the same transparency it is now. Where it is white is where you can color and where it is transparent, coloring there has no effect.
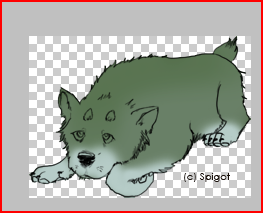
You can use any means necessary now to color without messing up your picture. This step is to put down the markings and patterns of the wolf pup.
Here concludes part one of the coloring tutorial. The next part is going to be how to add fur texture to your coloring.
 So helpful. I didn't know that about the multiply thingie. xD -dumb-
 I am happy to help